Paper Snow Globe Ornaments - Cricut Joy Holiday Gift
How to make keepsake newspaper snow globe ornaments with Cricut! We'll also show y'all how to make print and cutting projects with Cricut Joy! Sponsored by Cricut.
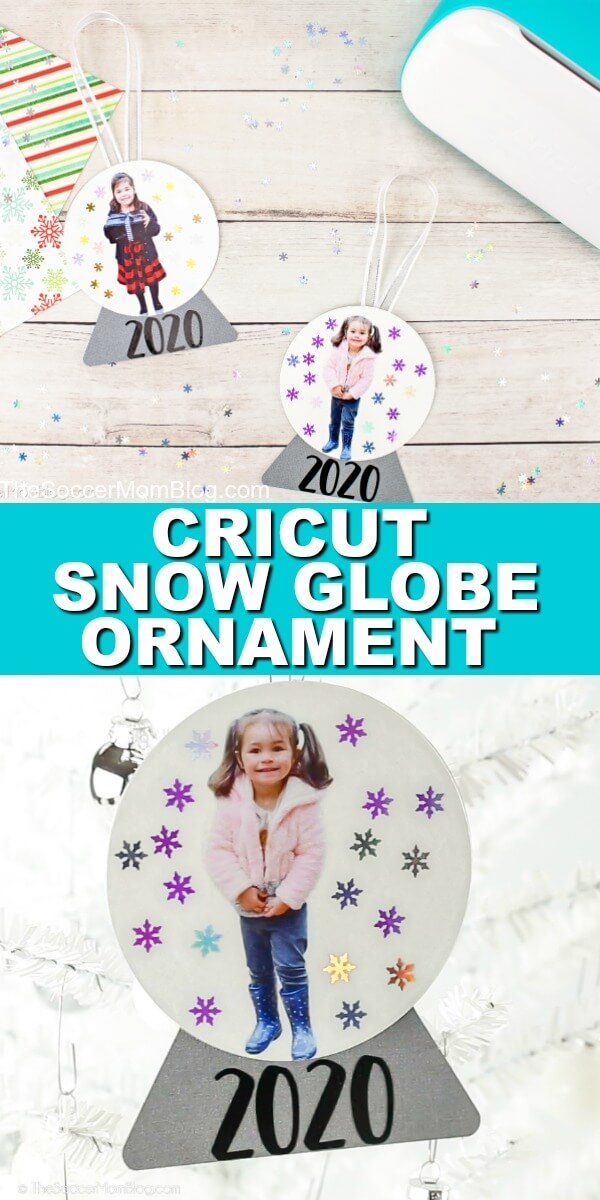
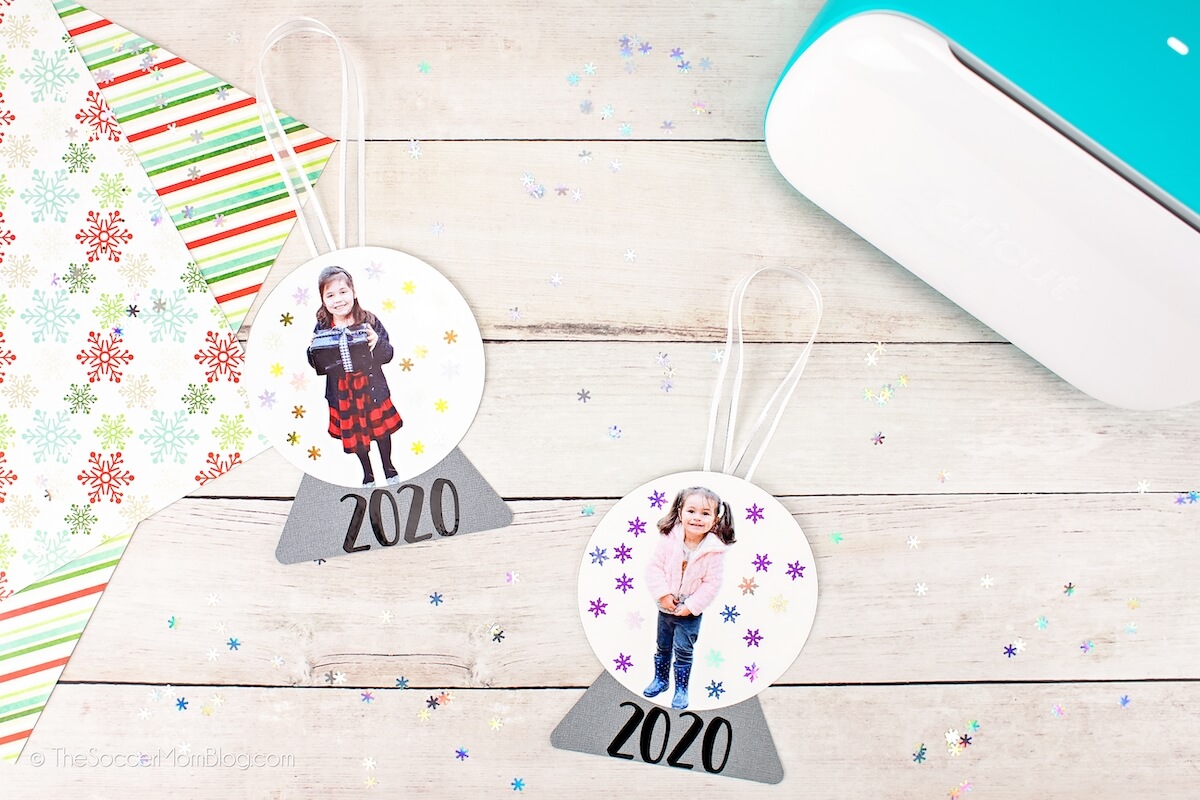
DIY Snow Earth Ornament with Photo — Made with Cricut!
Every year our family has an ornament-making twenty-four hours where we pick a special ornament arts and crafts to make for our friends and family unit.
One year it was orange pomanders. Some other year information technology was candy pikestaff ice skates. This year we are using our new Cricut Joy to brand snow globe photo ornaments!
I am fractional to photo crafts — nosotros've made lots of photograph cards over the years for every occasion!
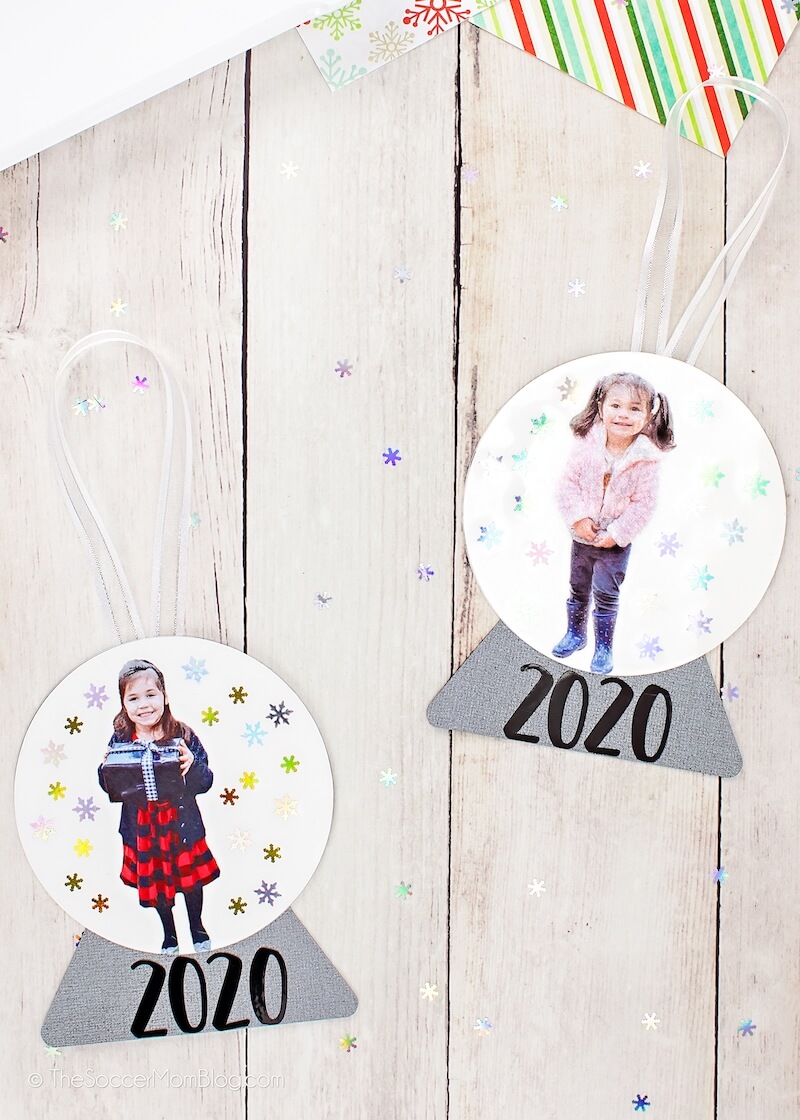
These Cricut Christmas ornaments turned out soooo cute and you can make them with whatever of the machines!
I love that they are personalized (like all of our Cricut projects) and that they are lightweight, so they won't pull downwardly the branches of your tree.
This is sure to be a treasured keepsake for years to come!
What You Need to Brand a Newspaper Snow Globe Ornamentation
This post contains store-able affiliate links to products we used to make our Cricut Christmas ornaments; our disclosure policy is available here.
- Cricut Joy — This tutorial shows footstep by stride photos for using the Cricut Joy, but you can apply the Maker or Explore likewise.
- Cricut Joy Motorcar Mat — I used the StandardGrip mat, but the LightGrip should work too.
- Printable Articulate Sticker Paper
- White Cardstock — For your photo to show up correctly, you'll need to use white cardstock as the background.
- Silver Cardstock — This is for our snow globe base of operations. I loved the way metallic silvery looked, only you can apply any color for this slice. The Cricut Poster Lath Metallics prepare had the perfect shimmery argent textile!
- Black Vinyl — This is what nosotros use to personalize our decoration with the date. Blackness showed upwardly well on our silverish base, only once again, you can utilise whatever colour y'all like.
- Essential Tool Fix — This includes handy tools for weeding, scraping, and lifting pieces of your Cricut projects. It's a must-have for whatsoever project!
- Ribbon
- Tape
- Kid's photograph — You'll need a digital version on your computer to upload into Cricut Design Space.
Related: Exist sure to read my list of the must-have Cricut Joy Accessories!
Tin you print and cut with Cricut Joy?
Technically, the Joy is not compatible with the print and cut characteristic. However, I found a shortcut to make it happen! Of course, considering the Cricut Joy is amazing!
Essentially we "play a trick on" Cricut Design Space into thinking nosotros're using a compatible car, such equally the Maker or Explore, while we do the printing portion of our project.
Then nosotros'll switch to the Joy for the cutting part of the project.
Information technology's really a elementary petty trick and I've detailed it below in the stride past step instructions.
I love the Joy because it's so lightweight and portable and I'thou thrilled that I can use it with this project likewise!
Want to know more about why I'm obsessed with my Cricut Joy? Click here to read my post that details all the benefits to the Cricut Joy. It's not only cute, information technology's powerful likewise!
How to Make a Snowfall Globe Ornament with Paper
Using our Cricut allows us to get precision cuts so each slice of our snow globe matches up perfectly! Here's how it's done…
How to Print and Cut with Cricut Joy
The first function of our project is the "impress and cut" portion. This allows us to print an image with our printer that our Cricut motorcar will know exactly where to cut effectually.
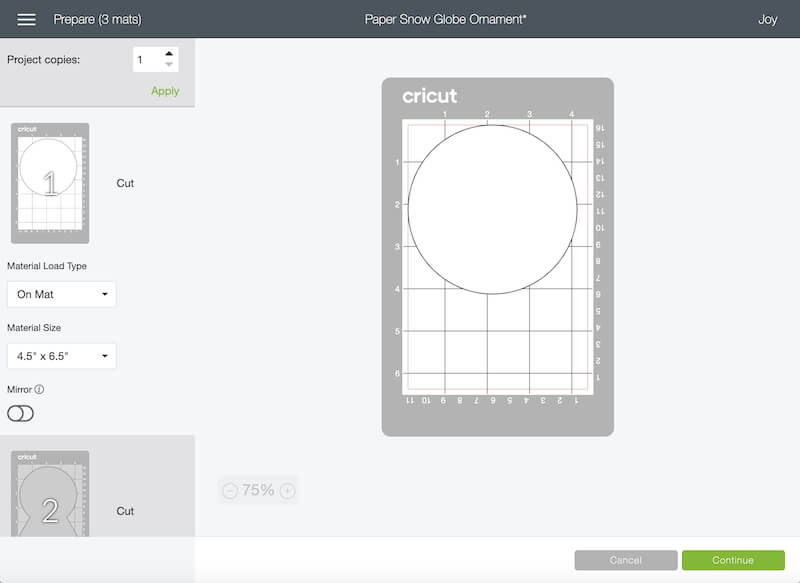
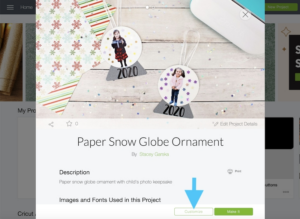
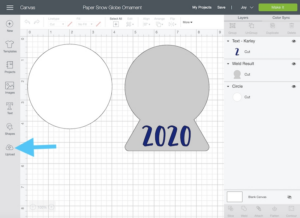
I created a project in Blueprint Infinite that y'all can utilize. Each piece of the snow world is already in that location for you and all y'all need to do is add your child's photo.
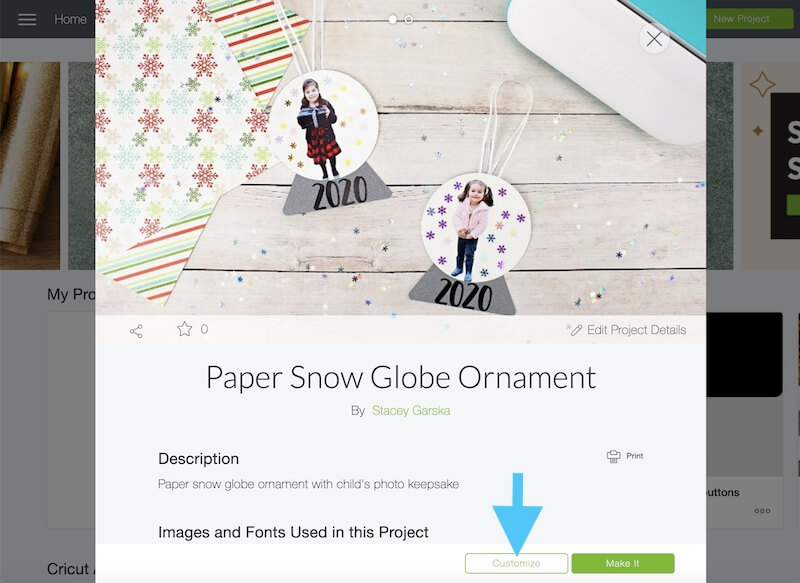
Click here to open up the projection in Cricut Blueprint Space. Click "customize" so you'll be able to add together your own child's photograph.
Once the project opens, click "upload" in the left side menu and then yous can add together your kid'due south photo.

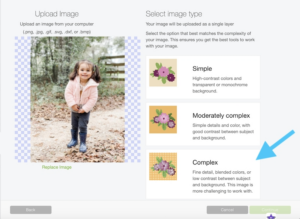
If you lot have already removed the background in an outside photograph editing programme, you lot can skip ahead a few steps.
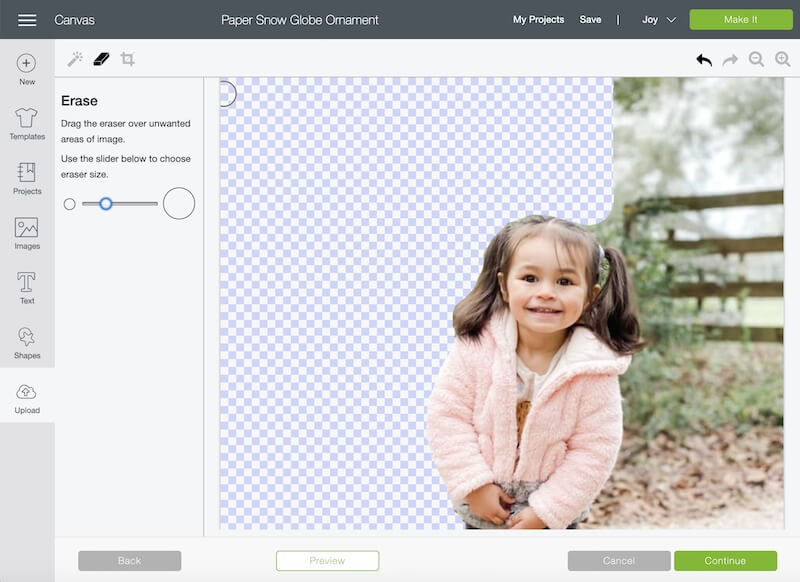
If non, you tin can remove the paradigm background within Blueprint Space. Click "complex" image to go started.
Use the eraser tool to remove the background, leaving only your child visible.
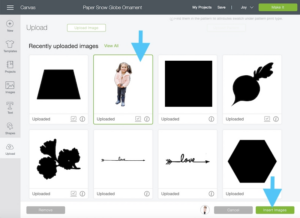
When finished erasing the background, click "proceed" and you should see your child's image in your recently uploaded images. Click on your child'due south photo so "insert prototype."

Your child'due south photo will at present appear in the project sail, but information technology might not exist the right size.
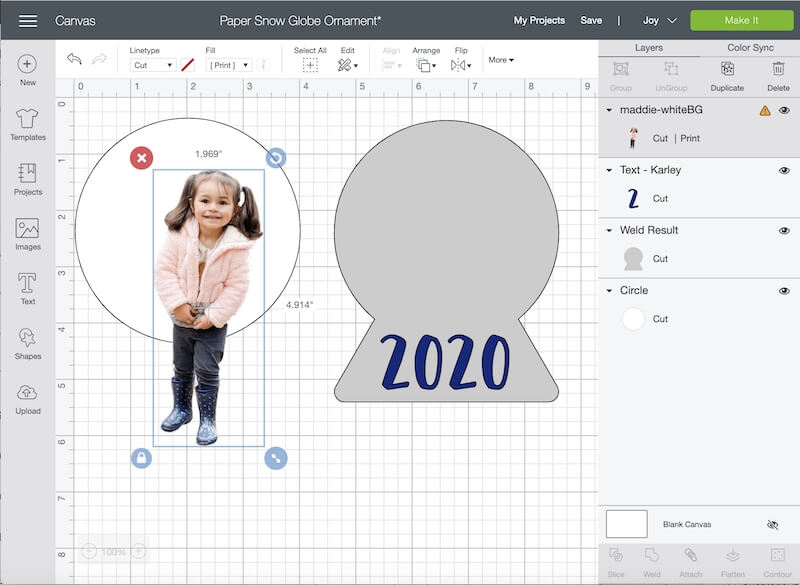
Employ the resize button in the lower left-paw corner of the child'southward photo to adjust the size as needed. Drag the paradigm and then information technology fits within the white circle.
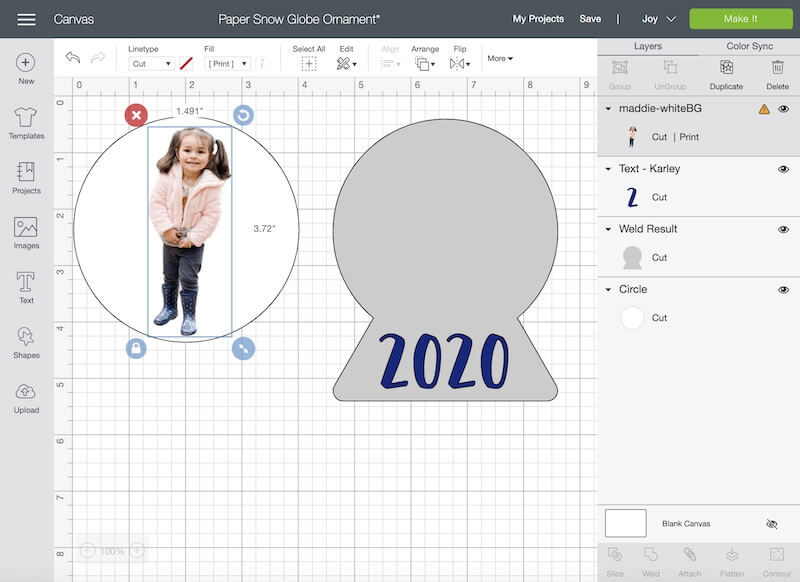
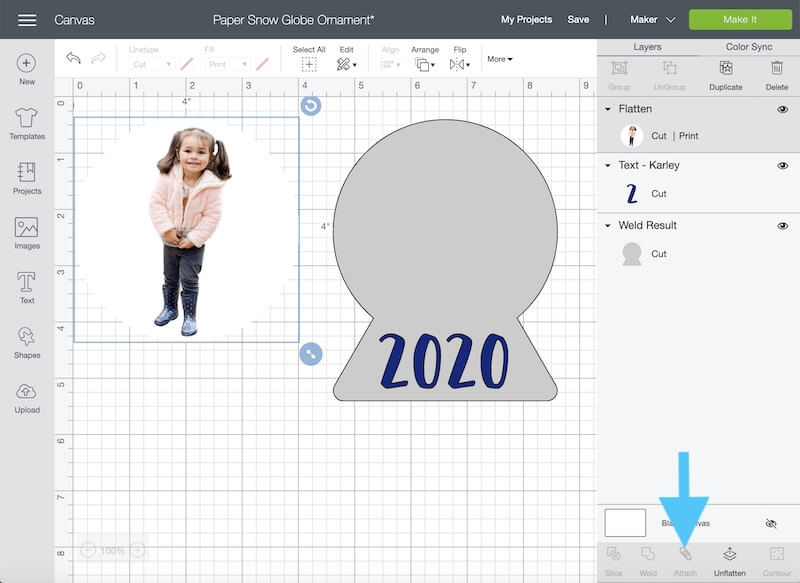
Command-click on child's image and the white circle, so they are both highlighted in the layer menu on the righthand side of the sheet.
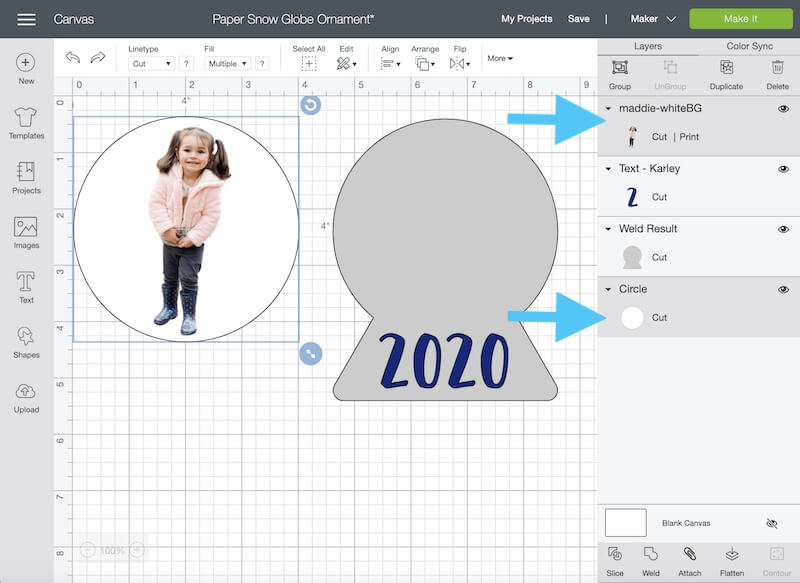
Select "attach" and "flatten" in layer menu.
Now it's time to print and cut our design.
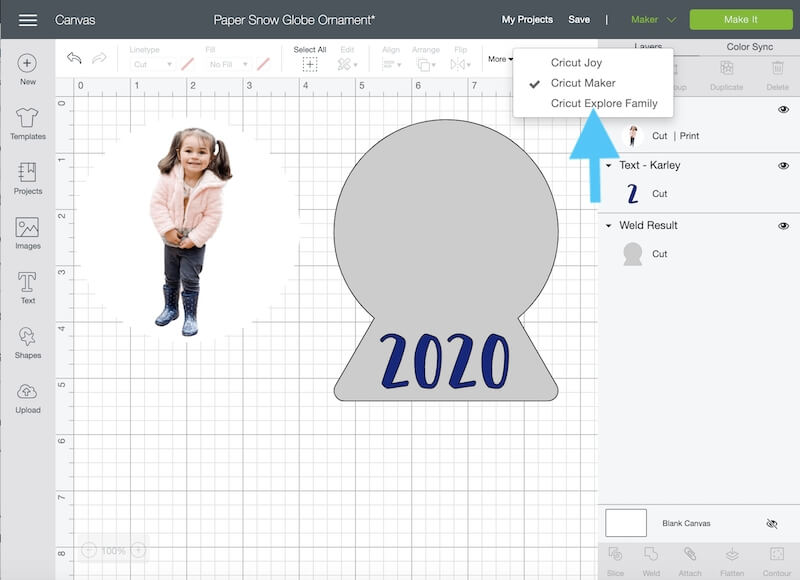
If you lot are using a Cricut Maker or Cricut Explore, select your machine in the top menu. If you are using a Cricut Joy, you'll need to select Maker or Explore for this pace also, even though you lot're not cutting with those machines.
If yous select Cricut Joy for the impress and cut step, you'll get a bulletin saying that the Joy is non compatible. And so we are substantially "tricking" Design Space into allowing us to keep by pretending we are using a uniform motorcar. Only don't worry, the Joy can totally cut our sticker newspaper perfectly once we're past the photo printing pace!

Load a canvas of clear sticker paper into your printer and click the "make it" dark-green button in superlative right of Design Space.
Click "Transport to printer" and bank check the button labeled "add bleed" — this will impress a blackness box around your photograph image that can be used as a guide for trimming it to fit our Joy car mat.
Select "Use arrangement dialogue" to bring up your printer carte (it may appear behind Blueprint Space) so you tin can make sure printer settings are correct for photos. The verbal setting will vary based on your printer, only for my printer I had to select "photo paper" and "best quality."
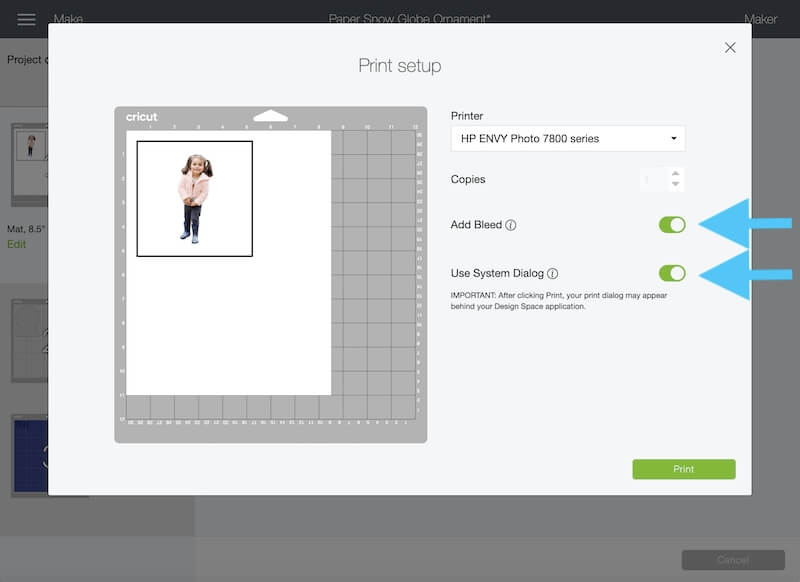
Click impress and your printer will create the image of your child outlined by a blackness box on the clear sticker paper.
Maker sure that the image is completely dry, then use a paper cutter to trim along the black box.

Cancel the cut project and go back to the canvas.
Leave the pattern without saving.
Re-open the design and click "arrive." Your child'due south image should be gone — that's just the way we need it!
If you're cutting with a Cricut Joy, be sure to select it equally the machine now.
The post-obit directions are showing making the project with a Joy, only you tin can also use the Maker or Explore. With the larger machines, y'all won't need to trim the clear sticker paper. You'll simply place on the machine mat in the top left corner.
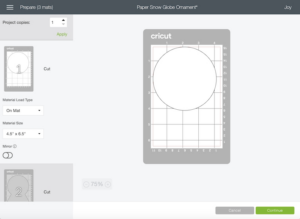
Click the green "make information technology" push in acme right corner. And so select "on mat" for cutting with your Joy.
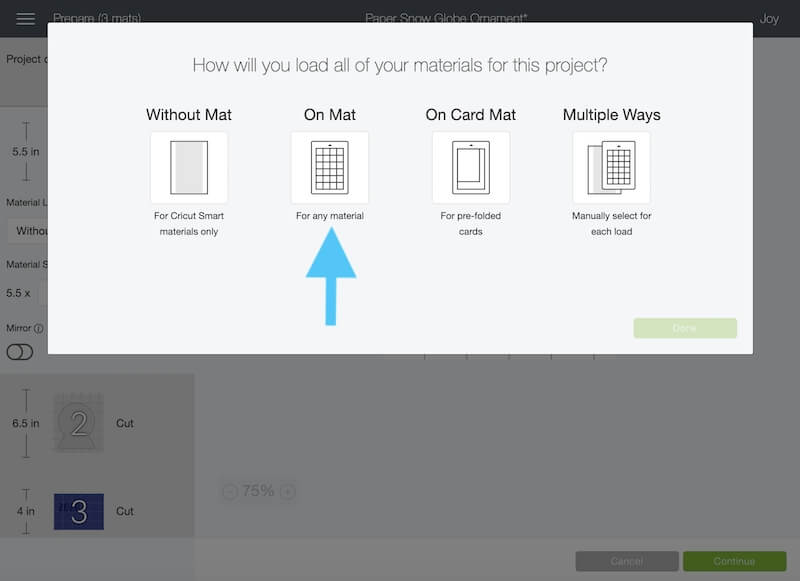
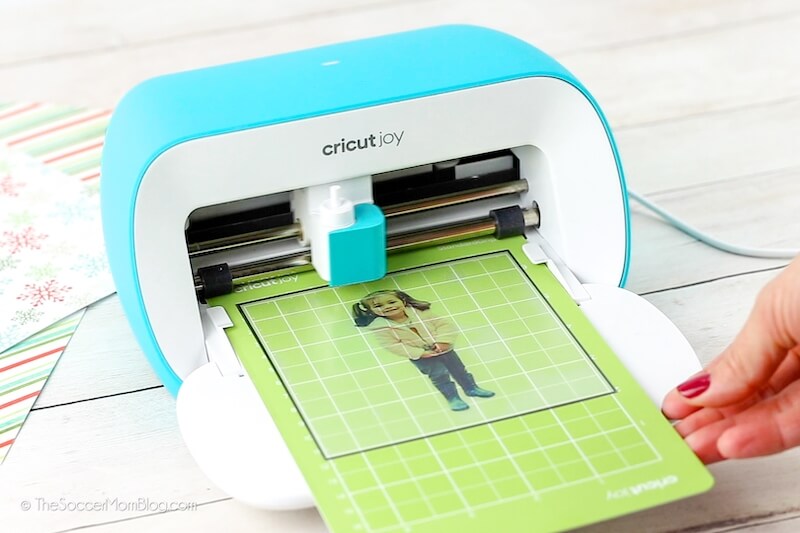
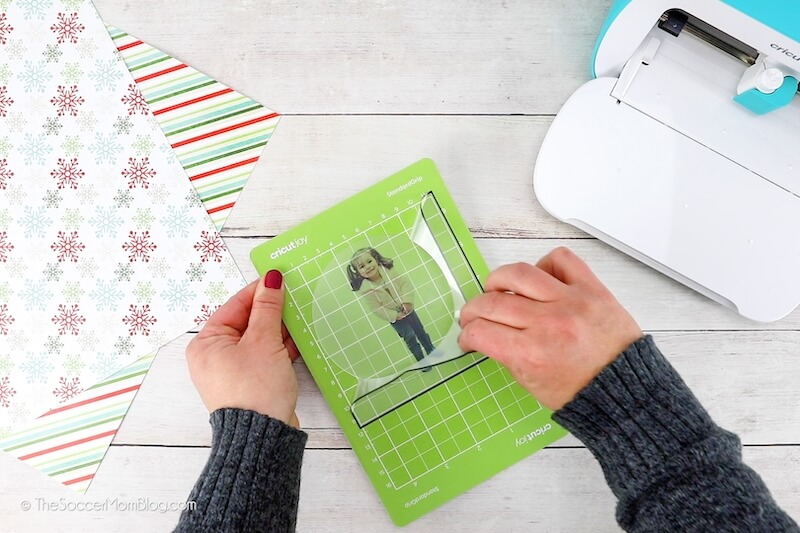
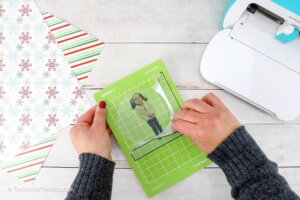
Load the printed sticker newspaper onto your Joy auto mat. I establish that to get the Joy to cut so that my kid'due south photo is perfectly within the circle we're making I need to cheat the top of the sticker paper about 1/viii-1/4" over the top line on the mat.
For cloth, select "deluxe paper" (since articulate sticker paper is not listed as a Joy material pick), switch pressure from "default" to "more" and click "Get."
If using a Maker or Explore, y'all should be able to select clear sticker paper as your material.
Once the cut is done, click "unload" in Design Space.
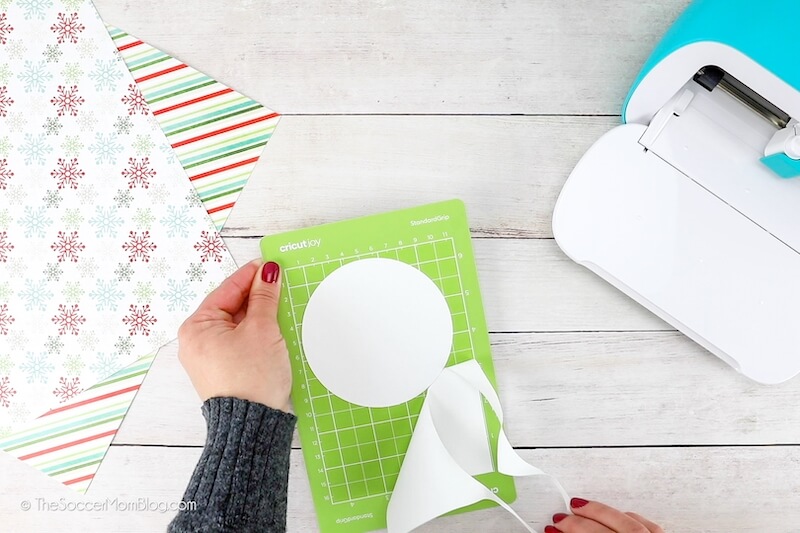
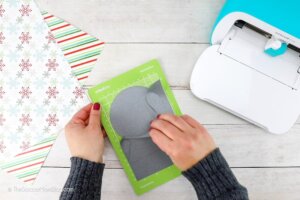
Remove sticker newspaper from mat and fix aside.
Place white cardstock onto a Joy machine mat. You may demand to trim the cardstock start and then it fits on the mat.
Click on the circle (Mat 1) and choose "cardstock" every bit material. Set pressure to "more than." Load mat into you lot Joy and press "Go" — this is cutting the same circle shape again, so it will lucifer your sticker.
When this is done, unload the mat and remove the white cardstock.
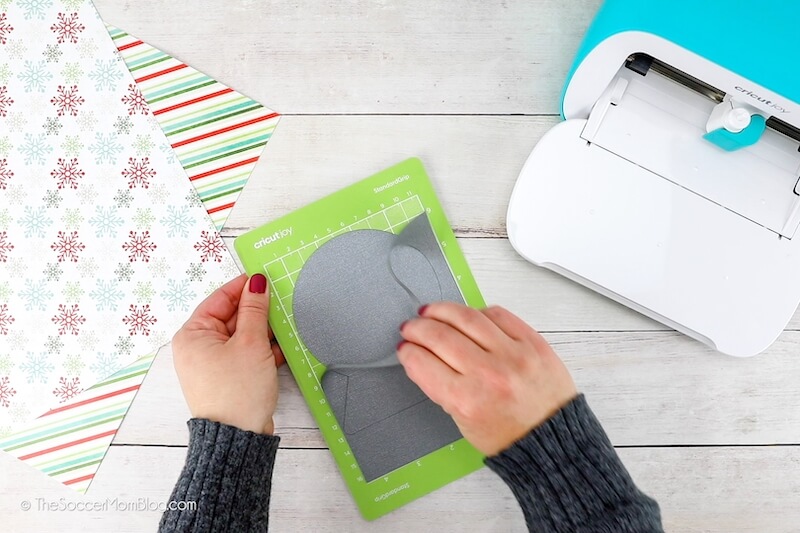
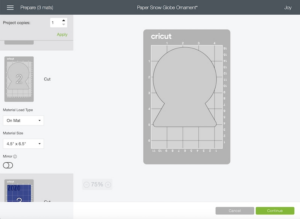
Click on "Mat ii," which is the snow world base of operations.

Load silver cardstock on your Joy mat. Make sure "cardstock" is cloth and pressure is "more than." Load the mat into your machine and click "go."
Unload and remove your silvery cardstock from mat.
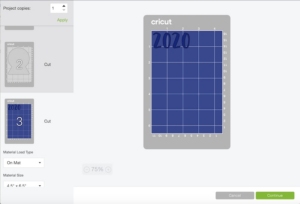
Load vinyl for numbers on mat — or utilise Joy Smart Vinyl which requires no mat.

Click on "Mat three" and select the specific material you're using. Load mat into machine and click "Go."

Unload and at present you take all of the layers for your snow glove.
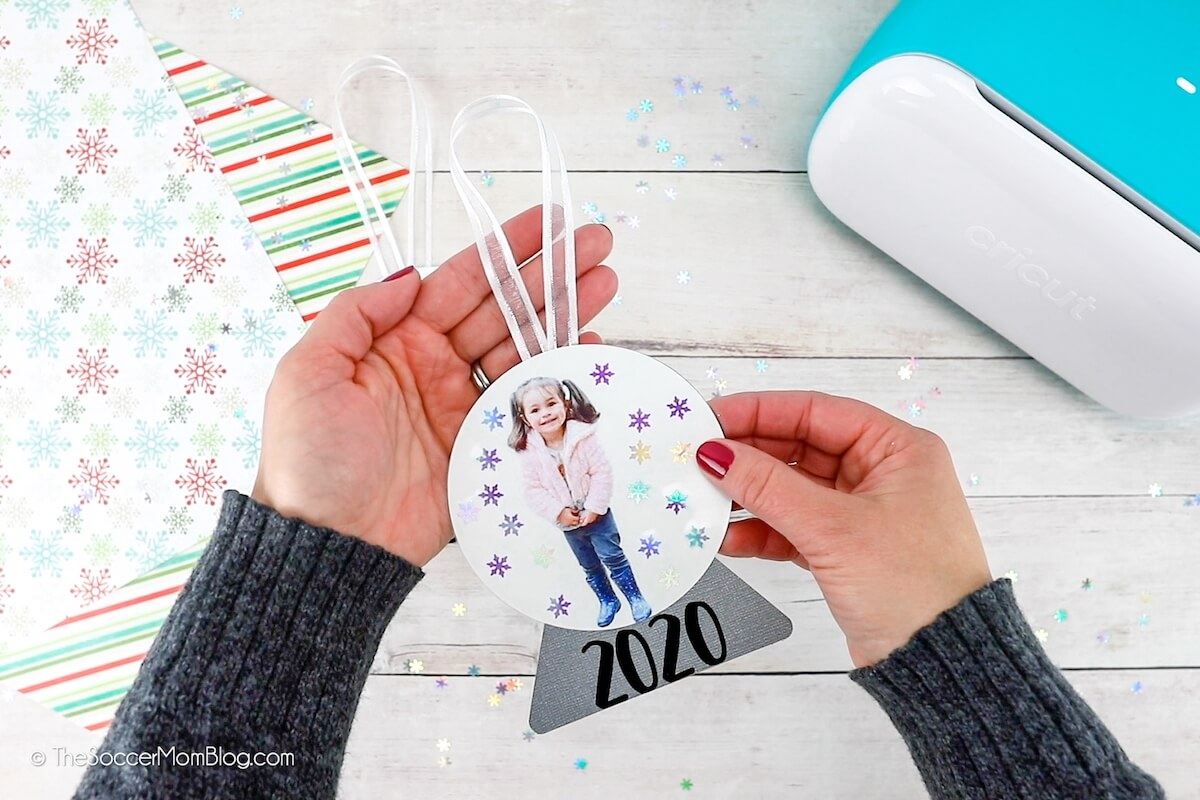
Now it'due south time to get together our newspaper snow globe ornamentation!
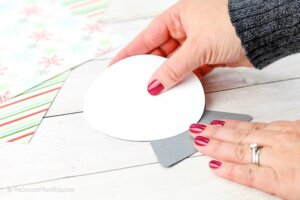
First, glue the white cardstock circle on top of the silver snow globe base.

This is where the Essential Tool Set actually comes in handy!
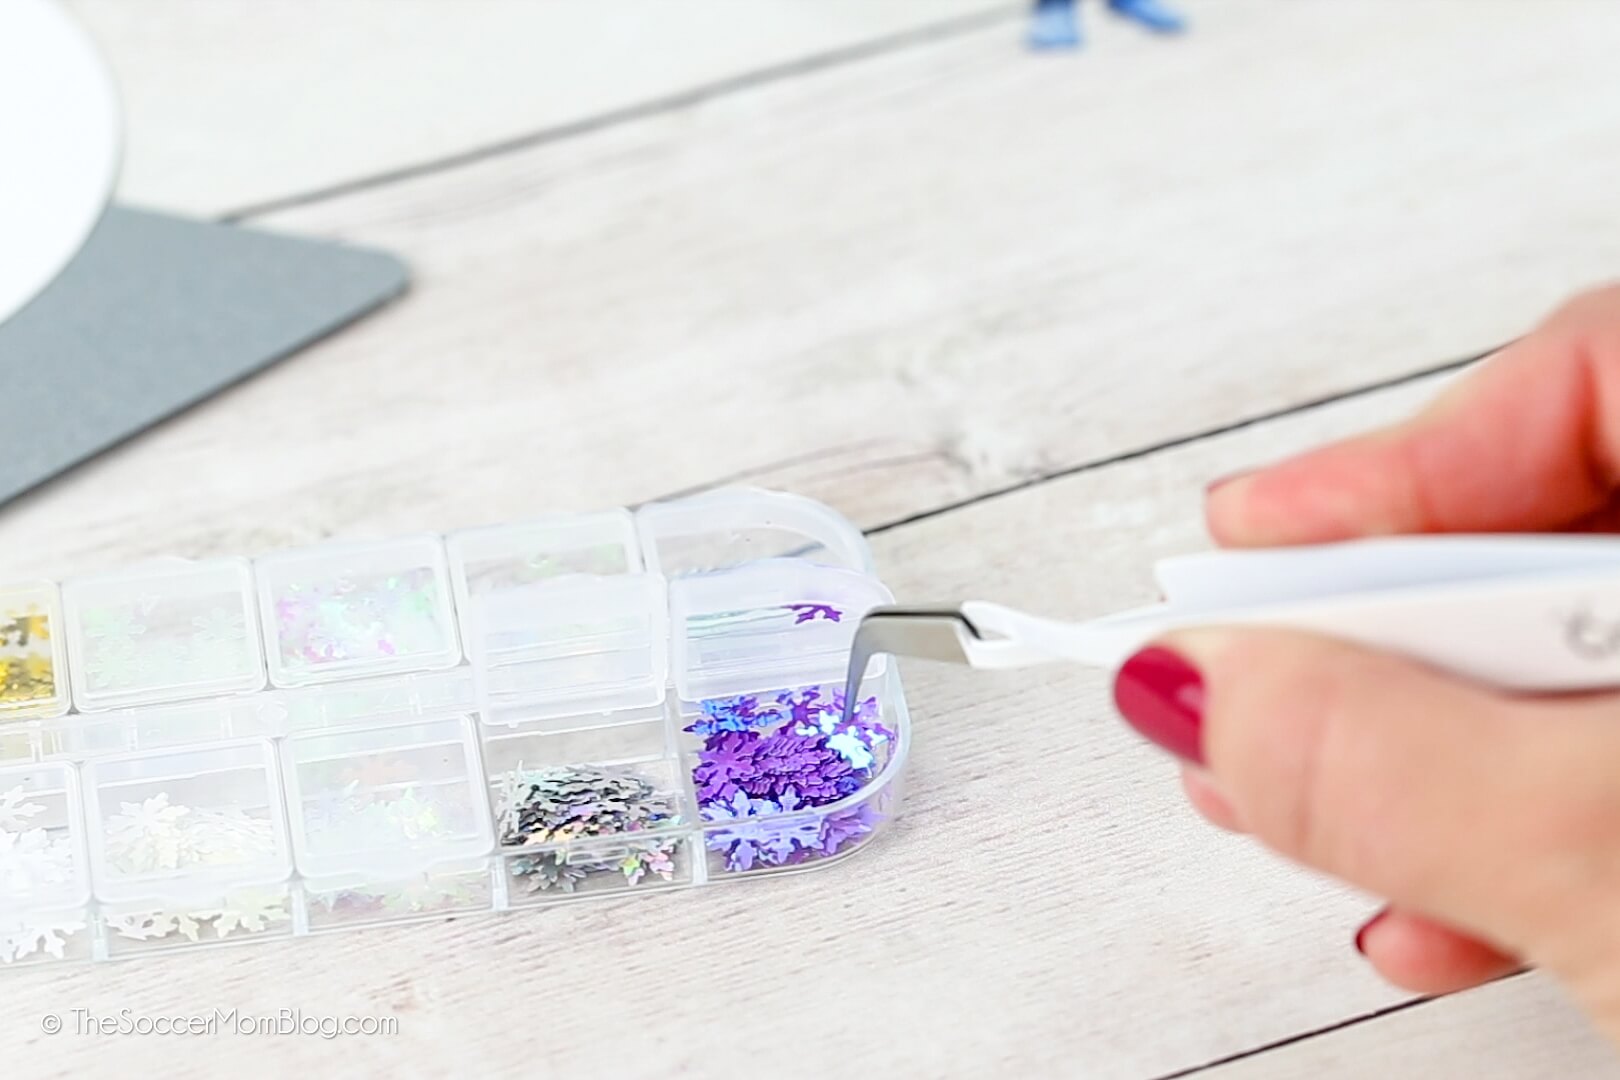
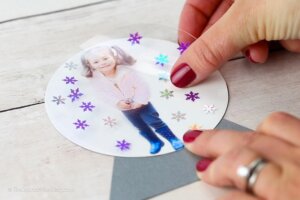
I used the tweezers to apply snowflake confetti to the adhesive side of the clear sticker paper.

Carefully identify the clear sticker on top of the white cardstock circle.
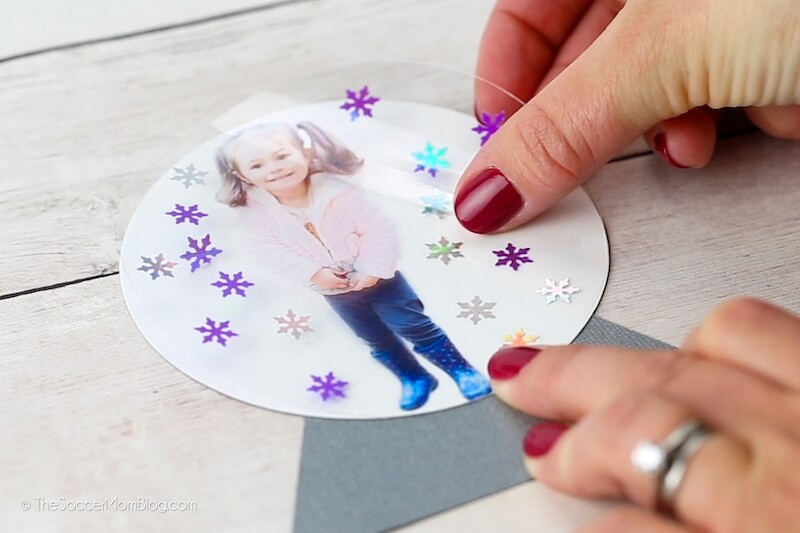
Remove the vinyl numbers from their backing and place on the snowfall globe base of operations.
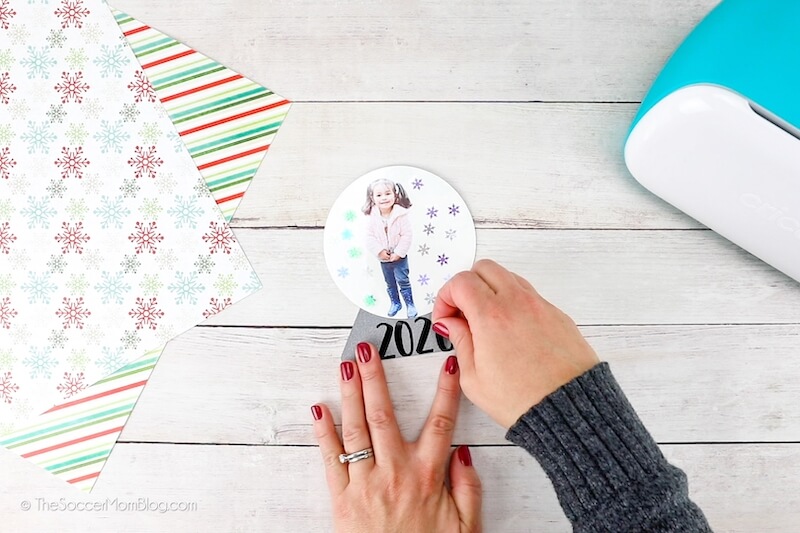
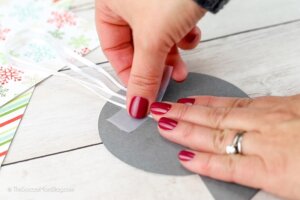
To hang our decoration nosotros taped a loop of ribbon to the back side.

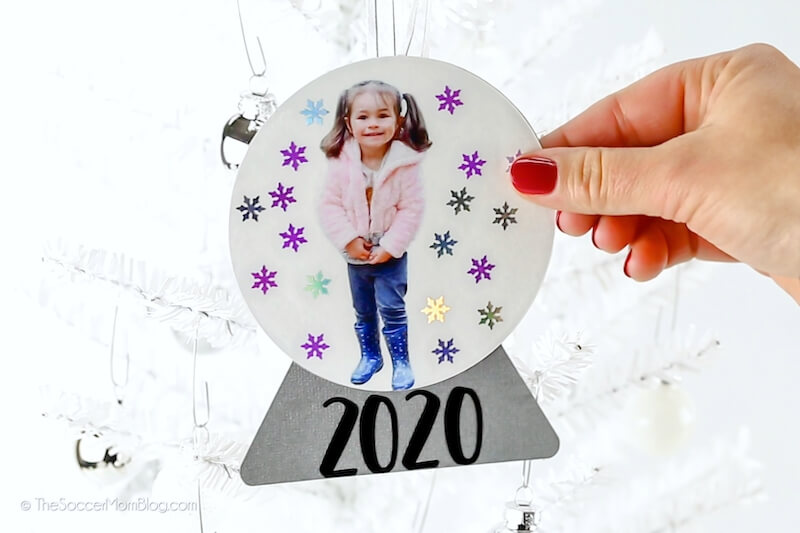
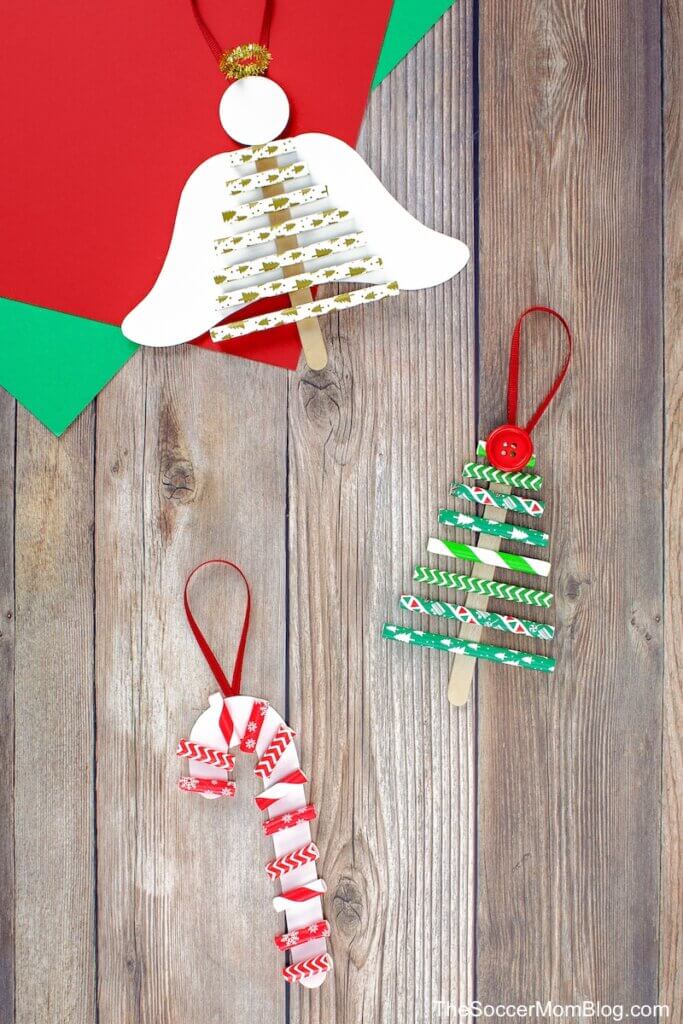
I'm and then excited how our paper snow globes turned out! So cute!
More Cricut Christmas Decoration Ideas
Concluding year we fabricated lots of personalized gifts with our Cricut Maker and EasyPress ii —from coasters, to personalized fleece blankets!
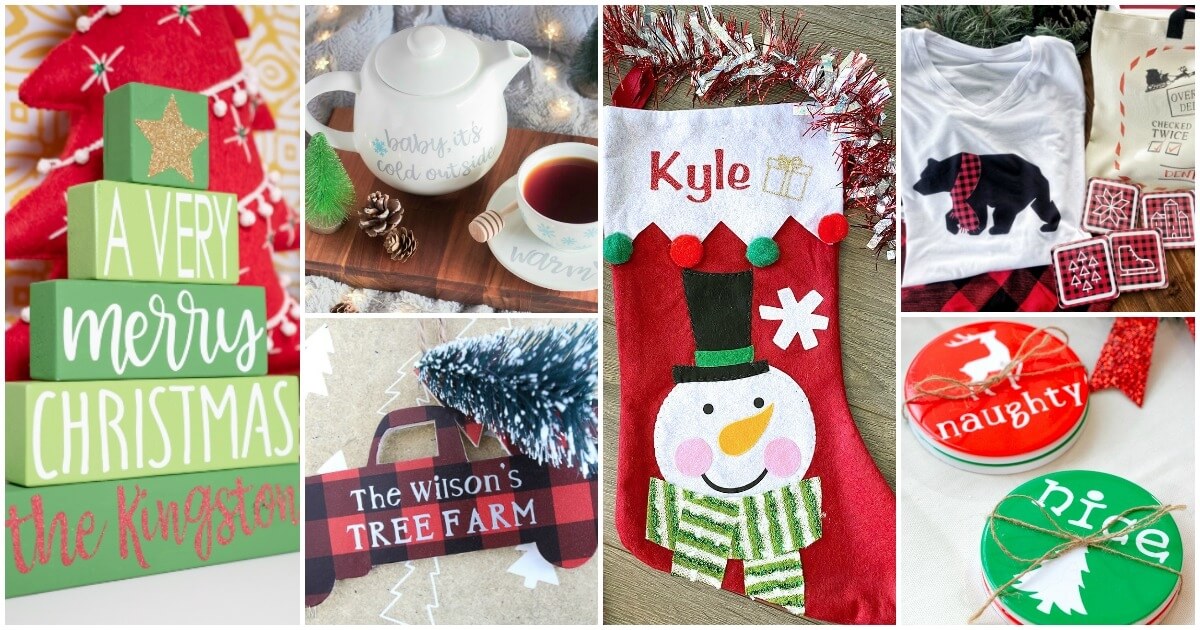
Click hither to see all of our favorite Cricut Christmas crafts, created by us and our favorite crafty blogger friends.
Printable Instructions to make DIY Photo Snow Globe Ornaments
Paper Snow World Ornaments fabricated with Cricut
How to make keepsake paper snow globe ornaments with Cricut!
-
Cricut Joy (or Maker, Explore)
- Kid's Photo digital copy
- Printable Articulate Sticker Paper
- Cardstock White and silverish
- Black Permanent Vinyl
- Ribbon
- Tape
- Snowflake confetti
-
Open projection in Blueprint Space by clicking "Customize"
-
Click "Upload" to add your kid's photograph.
-
If you have not already removed the groundwork in a photo editor, you tin can do so in Cricut. Click "complex" epitome to get started.
-
Employ eraser tool to remove the photograph background. Salve.

-
Click on child'due south paradigm and insert into your project.
-
Resize the kid's image to fit inside the white circle on the canvas.

-
Command-Click on child's epitome and circumvolve and select "attach" and "flatten" in layer menu.

-
For the print and cut portion of this projection, if yous have a Joy you will have to pretend you're using another machine to workaround the fault bulletin that says Joy is not uniform with print and cutting projects. Prepare car to either "Maker" or "Explore" but NOT Joy. Nosotros will switch to Joy later if that's what car you're using.

-
Load clear sticker newspaper in your color printer and click "Go far" light-green push in top right ofthe screen.
-
Click "Send to printer" and select "Use system dialogue" to make certain printer settings are correct. Make sure "add together bleed" is checked so you'll take the black box as your guide. Impress.

-
After information technology prints and dries, use paper cutter and trim along the black box.

-
Cancel the cut. This will have you back to the projection canvas. Exit the design without saving.
-
Open the project once again by clicking "customize." Kid's epitome should exist gone. That's proficient!
-
Switch your automobile to Joy (if that'south what you're using). If using another automobile, brand sure it is selected.
-
Load the printed sticker newspaper onto your joy mat. Cheat information technology near 1/8-i/4" over the top line of the mat. This should align it perfectly within the circumvolve that the Joy volition cutting. If using Maker or Explore, load normally.

-
If using Joy, set cloth as"palatial paper" and switch force per unit area from "Default" to "More." If using Maker or Explore, you can set textile as articulate printable sticker paper. Click GO to cutting.
-
One time cut is washed, click "unload" in design space and remove the sticker paper from mat.
-
Place white cardstock on mat (trimmed to fit if using Joy).
-
Click on the circle (Mat i) and choose "cardstock" as material. Set force per unit area to "more."
-
Load mat into joy and printing "Go" — this is cutting the same circle shape again, so information technology will lucifer your sticker.
-
When this is done, unload and brand sure to click on Mat 2, which is the snow globe. Load silver cardstock on Joy mat. Make sure "cardstock" is material and pressure is "more." Load in machine and click "become."
-
Unload and remove from mat.
-
Load vinyl for numbers on mat. Click on Mat 3 and Select which material you're using. Load mat in automobile and click "Go."
-
Unload mat and remove numbers. You're done with the Design Infinite role of the project.

Assembling the Snow Globe
-
Glue white cardstock circle on silver snowfall globe base of operations.
-
Utilize snow scrap confetti to the agglutinative side of the sticker paper, around the child'south photo.

-
Carefully place the clear sticker newspaper on elevation of the white cardstock circle.
-
Remove backing from the numbers and stick to the snow globe base of operations.

-
Utilise tape to secure a ribbon loop to the back of ornament.
Pivot this craft on Pinterest:

You might also like:
Paper Straw Christmas Ornaments
- Author
- Recent Posts

Stacey is the creator of The Soccer Mom Blog, a Houston Texas mom blog that focuses on positive living for women and families. She loves to share real food recipes, money-saving tips, parenting encouragement, kids activities, DIY tutorials, dwelling house hacks, fitness, and then much more! To get to know Stacey even amend, click hither.
Latest posts past Stacey aka the Soccer Mom (see all)
- Irish Beef Stew - February 28, 2022
- Homemade Chick-Fil-A Polynesian Sauce - Feb 25, 2022
- Sourdough Pancakes - February 24, 2022
Source: https://thesoccermomblog.com/paper-snow-globe-ornaments-cricut/